 Ms. Lê Thị Ánh Trinh
Raw nata de coco is a popular ingredient in many summer desserts. With its chewy and crunchy texture, this topping is loved by many people. To make it, you only need three basic steps: remove the sour taste, soak it until it expands, then cook it with rock sugar syrup and optional ingredients like chia seeds, red dates or pandan leaves.
1. What is raw nata de coco?
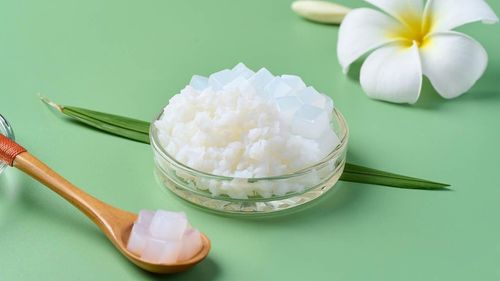
Raw nata de coco (or coconut jelly) is a type of jelly naturally fermented from mature coconut water, then cut into pieces and dried for preservation. This jelly has an opaque white color, a chewy and crunchy texture and often carries a slightly sour smell due to the fermentation process. Before use, raw coconut jelly needs to be soaked and thoroughly rinsed to remove the sour taste before being prepared for desserts or beverages.
2. How to cook raw nata de coco with rock sugar at home
2.1 Ingredients for raw nata de coco with rock sugar
The ingredients needed to make raw nata de coco at home for 2 - 3 servings include:

2.2 How to cook raw nata de coco with rock sugar
2.2.1 Step 1: Soak and rinse the coconut jelly
Place the raw nata de coco in a bowl of clean water. Gently squeeze and rinse it several times, changing the water repeatedly until it becomes clear and the sour smell disappears. Then, soak the jelly in water for about 8 hours so the pieces can fully expand and reach the desired softness.
2.2.2 Step 2: Blanch the nata de coco
First, bring a pot of water to a boil, then blanch the nata de coco for about 1 - 2 minutes. After that, remove it and rinse with cold water, then let it drain completely. This step helps the jelly achieve a pleasantly chewy and crunchy texture.
2.2.3 Step 3: Cook the coconut jelly with rock sugar
Dissolve the rock sugar in the prepared amount of water and bring it to a boil. Once the water starts gently boiling, add the coconut jelly and cook for about 15 - 20 minutes, then turn off the heat. This allows the jelly pieces to fully absorb the sweetness of the rock sugar.
Tip: To enhance the aroma and overall flavor of the dessert, you can add a few drops of coconut oil or include several pandan leaves during the cooking process. If you do not use all of the coconut jelly at once, transfer the remaining portion into an airtight container or sealed jar and store it in the refrigerator so you can keep it fresh and enjoy it later.
3. How to cook raw nata de coco with chia seeds and red dates
Besides the traditional method of cooking raw nata de coco with rock sugar, you can also combine it with chia seeds and red dates to create a more flavorful and refreshing snack, adding both nutritional value and a unique taste to the dessert.
3.2 Ingredients for nata de coco with chia seeds and red dates
Below is the detailed ingredient list for approximately 5 - 6 servings:
3.2 How to cook raw coconut jelly with chia seeds and red dates
3.2.1 Step 1: Prepare the raw coconut jelly
Place the raw coconut jelly in water, gently squeeze it, and rinse about four times (around 5 minutes each time) to remove the sour smell. Then, squeeze firmly to drain the water and soak it in clean water for about 8 hours. Once the jelly has expanded evenly, blanch it briefly in boiling water for about 1 minute, then transfer it to cold water. After that, press out the excess water with a ladle so the jelly maintains its pleasantly crunchy texture.
3.2.2 Step 2: Cook the rock sugar syrup and red dates
Place a pot on the stove with 3 liters of water and 1kg of rock sugar, stirring until the sugar completely dissolves. Then add the prepared coconut jelly, red dates and pandan leaves to the pot. Simmer over medium heat for about 20 minutes so the red dates release their natural sweetness and the coconut jelly absorbs the sugar syrup. Next, add the remaining 3 liters of water and continue cooking for about 10 more minutes before turning off the heat.
3.2.3 Step 3: Add chia seeds and lychee flavor
While waiting for the nata de coco to cool, soak 1 teaspoon of chia seeds in 50ml of warm water until the seeds fully expand. Then add 3 tablespoons of lychee syrup and the soaked chia seeds to the pot and stir well. Finally, chill the cooked coconut jelly mixture in the refrigerator for about 3 - 4 hours before serving.
4. Tips to make crunchy coconut jelly without it becoming mushy
To turn dried coconut jelly pieces into a refreshing dessert that is crunchy, chewy and free from sour odors, keep the following tips in mind:
Remove the sour taste thoroughly: Place the nata de coco in a bowl of clean water while continuously running fresh water over it. Firmly squeeze the jelly for about 5 - 7 minutes. Repeat this process at least four times to completely remove the slimy layer and the characteristic sour taste.
Drain the coconut jelly well: After rinsing, place the coconut jelly in a cloth bag or strainer and squeeze it firmly to remove excess water. This step helps the jelly absorb fresh water and flavors more effectively.
Soak for maximum expansion: Soak the nata de coco in clean water for at least 8 hours (or overnight). Raw coconut jelly absorbs water easily, and once fully hydrated, it expands, becomes clearer and develops a better crunchy texture.
Blanch briefly in boiling water: Before cooking, blanch the coconut jelly in boiling water for about 1 minute, then immediately transfer it to cold water. This quick temperature change helps stabilize the texture, making the jelly chewier and less likely to become mushy.
Use rock sugar: Avoid using granulated sugar, rock sugar provides a milder sweetness and helps keep the syrup clear.
Add canned fruit syrup: For a richer flavor, you can add syrup from canned fruits such as lychee, longan, or peaches at the final stage of cooking.
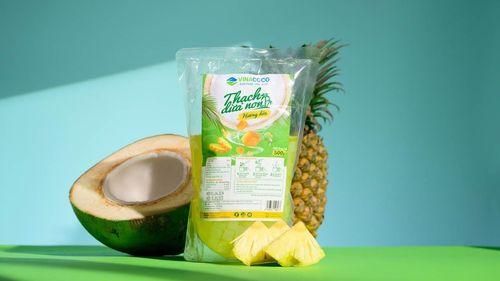
If you still do not feel confident about preparing raw nata de coco at home, you can purchase nata de coco products made by GC Food Joint Stock Company (GC Food). By applying Pasteurization technology, their coconut jelly retains its fresh flavor and pleasantly crunchy texture. In addition, GC Food also uses Aseptic UHT sterilization technology for export products to extend shelf life without the need for preservatives.
5. Colorful childhood-style coconut jelly recipe
If you want to make coconut jelly more visually appealing and vibrant, divide the cooked coconut jelly from section 2 into three equal portions and create colors following the instructions below:
For a blue color: Soak butterfly pea flowers in hot water to extract the color, then add the liquid to the pot of coconut jelly while cooking.
For a purple color: Boil magenta leaves with rock sugar, strain out the solids, then simmer the coconut jelly in the colored syrup over low heat.
For a pinkish-red color: Blend beetroot or red dragon fruit and strain to extract the juice. Then bring the juice to a boil and cook it with the remaining coconut jelly.
After completing the coloring process, place three spoonfuls of the coconut jelly - each representing a different color - into a glass, add some ice, and then enjoy this vibrant and refreshing dessert.

The raw coconut jelly recipes above are suggested by the GC Food team, a company specializing in the production and distribution of high-quality coconut jelly products.
6. FAQs about cooking raw coconut jelly at home
6.1 How long should raw nata de coco be cooked?
After the sugar syrup starts boiling, cook the raw nata de coco over medium heat for about 15 - 20 minutes. This amount of time allows each piece of coconut jelly to absorb the mild sweetness while still maintaining its characteristic crunchy and chewy texture.
6.2 Why is my coconut jelly not crunchy?
Soft or mushy coconut jelly is usually caused by three main reasons: soaking the jelly longer than recommended, skipping the blanching step in boiling water to stabilize the texture, or cooking it for too long, which breaks down the structure of the jelly.
6.3 How long can coconut jelly be stored?
To preserve its flavor, store the coconut jelly in an airtight container or glass jar and keep it in the refrigerator. Under these conditions, the jelly will maintain its best taste and quality for about 5 - 7 days.
6.4 What is the difference between rock sugar and white sugar?
Rock sugar has a milder and smoother sweetness that does not create the sharp aftertaste often associated with white sugar. In addition, rock sugar helps keep the syrup clear and enhances the natural aroma of accompanying ingredients such as pandan leaves or lychee syrup.
6.5 What is the difference between dried nata de coco and raw nata de coco?
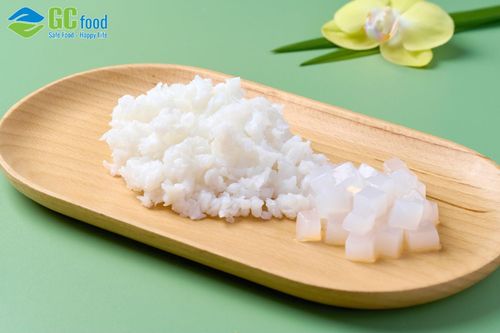
Dried nata de coco focuses on the seasoning and drying or caramelizing process, while raw nata de coco mainly involves soaking and cooking. After raw coconut jelly is cooked, it can be dried or simmered until the liquid evaporates completely, resulting in crispy, golden-brown jelly pieces.
GC Food hopes that after reading the raw coconut jelly recipes above, you will feel confident preparing this dessert for your family. If you do not have time to cook, you can also purchase and enjoy coconut jelly products from GC Food Joint Stock Company (GC Food) on the About Us page.
This article was compiled by Le Thi Anh Trinh - Communications Department of GC Food, specializing in collecting and sharing in-depth knowledge about ingredients and the production processes of aloe vera and nata de coco.