Mr. Lê Trí Thông
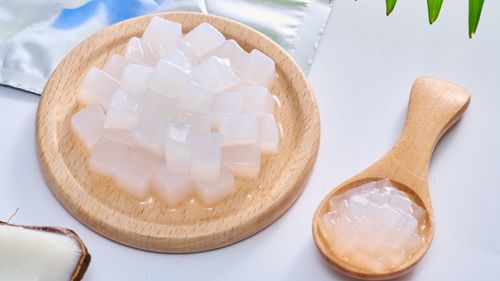
Nata de coco is a popular topping in many refreshing drinks thanks to its chewy, crunchy texture and light sweetness. Many people still wonder what it’s made of and how to prepare this coconut jelly at home to achieve the same bite. This article shares a simple method you can try at home and explains how the chewy coconut topping is produced on an industrial scale.
1. What is nata de coco?
Nata de coco is a product made through the fermentation of mature coconut water using the bacterium Acetobacter xylinum. During fermentation, the bacteria convert the natural sugars in coconut water into cellulose, forming a translucent white jelly with a firm, chewy, and slightly crunchy texture.
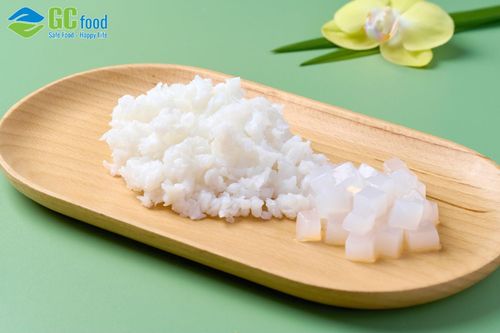
After harvesting, the jelly layer is washed several times to remove impurities, then cut into small cubes and cooked in sugar syrup to create a light, pleasant sweetness. In industrial production, the product is further filled into containers and pasteurized before being distributed to the market.
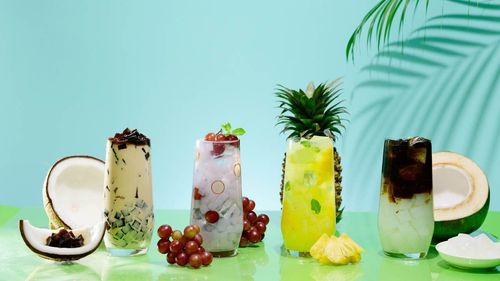
Thanks to its crisp, chewy texture and refreshing taste, nata de coco has become a popular topping in many modern beverages and desserts. Today, it is commonly found in many popular drinks and desserts among young consumers, including bubble tea, yogurt, and traditional sweet soups.
2. What is nata de coco made from?
The key ingredient in nata de coco is mature coconut water, which makes up the largest portion of the mixture. To better understand what this coconut jelly is made of, refer to the basic ingredients list below.
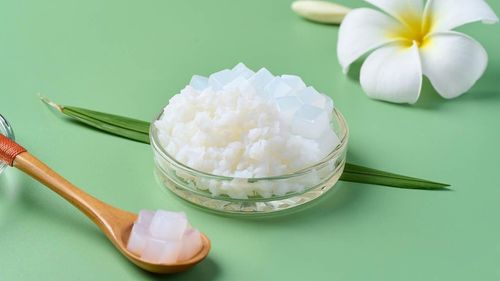
After a fermentation period of about 7 - 14 days, the cellulose fibers gradually bind together and accumulate into a thick, opaque white layer that forms on the surface of the liquid. This product is known as raw nata de coco, which typically has a cloudy white color and a strong sour taste due to the fermentation process.
3. Nutritional value of nata de coco
Nata de coco has long been a favorite among consumers thanks to its pleasantly chewy texture and the nutritional benefits it offers, including:
Low in calories: On average, 100 g of nata de coco contains about 92 kcal, depending on the amount of sugar added during processing.
High in dietary fiber: The jelly is formed from natural cellulose fibers created during fermentation. These fibers help support bowel movements, promote digestive health, and help you feel full for longer.
Virtually fat-free: Nata de coco contains little to no fat, making it suitable for people who are dieting or following a healthier eating plan.
Low natural sugar: In its raw form, this coconut jelly has almost no natural sweetness. The sweetness in most commercial products mainly comes from syrup or sugar solution added during processing. Because of this, consumers can better control their sugar intake by choosing raw or unsweetened coconut jelly.

4. How to make nata de coco at home
4.1 Ingredients for making nata de coco
To make this coconut jelly at home, you first need to prepare all the necessary ingredients and follow the proper fermentation process to cultivate the jelly.
4.2 How to make white coconut jelly at home
4.2.1 Step 1: Prepare the fermentation mixture
Dissolve the ingredients completely, including coconut water, sugar, and the starter liquid (kombucha), according to the prepared ratio. Then pour the mixture into a clean glass jar or container, ensuring it is well sanitized, to start the fermentation process under stable conditions.
4.2.2 Step 2: Store it properly
Cover the mouth of the jar with a thin cloth or a clean towel to keep out dust and insects. However, do not seal the jar tightly, as the microorganisms in the mixture need airflow to carry out the fermentation process.
4.2.3 Step 3: Monitor the jelly layer formation
Place the jar in a cool, well-ventilated area, away from direct sunlight, and avoid moving it too often. After about 3 - 4 days, a thin jelly layer will gradually begin to form on the surface of the liquid.
4.2.4 Step 4: Feed and maintain the culture
To help the jelly layer grow thicker and firmer, you can add more nutrients to the culture. Mix 1 liter of coconut water with 50 g of sugar, then gently move the jelly layer slightly to one side and pour the new liquid into the jar.
Note: Avoid pouring the liquid directly onto the forming jelly surface, as this may disturb or damage the structure of the developing layer.
4.2.5 Step 5: Harvest the final product
After about 10 days, you can harvest the raw coconut jelly layer, which typically reaches a thickness of around 1.5 cm. If you prefer a thicker layer, you can continue the fermentation process until around day 15 before harvesting.
This nata de coco recipe is shared by the GC Food team, a company specializing in the production and distribution of Ben Tre coconut jelly that meets international quality standards.
5. Common mistakes when making coconut jelly at home
5.1 Using the wrong fermentation container
If you use plastic jars or containers made from stainless steel or other metals, the jelly may not develop properly or fail to form into a solid layer. For better results, it is recommended to use ceramic, porcelain, or glass containers, which create a more suitable environment for fermentation.
5.2 Sealing the container too tightly
Many people worry about dust or insects getting into the fermentation liquid, so they tightly seal the jar. However, the fermentation process requires oxygen for the bacteria to function properly. If the container is sealed, the lack of airflow can kill the bacteria and prevent the jelly layer from forming. Instead, simply cover the jar with a thin cloth or clean towel to keep out dust while still allowing proper ventilation.
5.3 Not removing the sour taste of raw jelly
After fermentation, raw coconut jelly usually has a very strong sour taste, similar to vinegar. If you simply rinse it lightly and cook it with rock sugar right away, the final product may still have a strong smell and an unpleasant sour flavor.
To avoid this, the raw jelly needs to be prepared properly by rinsing it several times with clean water while gently squeezing and pressing to remove the sour liquid. After that, blanch the jelly in boiling water for about 5 minutes to help eliminate the acidic smell before continuing with the next processing step.

5.4 Pouring coconut water directly onto the jelly surface
If you pour fresh coconut water directly onto the forming layer during the feeding process, the cellulose structure may be disrupted. As a result, the bonding process of the jelly can be interrupted, preventing the layer from thickening properly over time.
Instead, use a clean spoon to gently move the jelly layer slightly to one side before pouring the sweetened coconut water into the space. This allows the new liquid to slowly blend with the existing mixture without disturbing the delicate layer forming on the surface.
6. Industrial nata de coco production process at GC Food
The nata de coco production process at G.C Food Joint Stock Company (GC Food) follows a closed supply chain, from raw material selection to final packaging and distribution.
Step 1: Inoculation and fermentation
After harvesting, mature coconut water is pasteurized and inoculated with Acetobacter xylinum bacteria. Under strictly controlled temperature and pH conditions, the bacteria convert natural sugars into a layer of cellulose. After about 7 - 10 days, a thick white jelly layer forms on the surface and is ready for harvesting.
Step 2: Shaping the jelly
Once harvested, the jelly is soaked in clean water until it expands evenly. It is then processed through specialized cutting machines to create cube-shaped pieces or long strips, depending on production needs. To ensure maximum safety, the jelly is cooked and sterilized in a pressure system before moving on to the final processing stage.

Step 3: Packaging
The coconut jelly topping is packed together with sugar syrup in sterile packaging conditions. By applying an automated system, GC Food minimizes human contact during processing, reducing the risk of contamination and ensuring consistent quality across every product.
7. How does factory production differ from homemade coconut jelly?
Below is a detailed comparison between making coconut jelly at home and producing it on an industrial scale:
While homemade methods are mainly for small-scale experimentation, the industrial production process at GC Food focuses on product safety and consistent quality. By applying a closed production system, GC Food ensures that nata de coco has a longer shelf life while still maintaining its natural flavor and signature chewy texture. This level of stability and quality is difficult to achieve consistently with traditional handmade methods.
8. FAQs - Common questions about making coconut jelly at home
8.1 What dishes can you make with coconut jelly?
You can use coconut jelly as a topping for bubble tea, sweet soups, yogurt, or fresh fruit desserts. It can also be prepared as convenient, ready-to-eat jelly cups, perfect for quick snacks throughout the day.
8.2 How can you make coconut jelly crunchier?
To improve the texture, rinse the raw jelly thoroughly several times and briefly blanch it in boiling water to remove the sour smell. This process helps stabilize the cellulose structure and enhances the crunchy texture before you cook the jelly with sugar syrup.
8.3 Is coconut jelly good for your health?
Thanks to its high natural cellulose content and almost zero fat, coconut jelly is considered a relatively healthy snack. When consumed in moderation, it may support digestion, help maintain a longer feeling of fullness, and assist with weight management.
8.4 Is coconut jelly made from fresh coconut water?
No. Coconut jelly is typically made from mature coconut water rather than fresh coconut water. Mature coconut water contains richer nutrients, creating an ideal environment for microorganisms to ferment and convert natural sugars into the chewy jelly layer.
In summary, coconut jelly is a popular topping created through the fermentation of coconut water, known for its crunchy texture and light sweetness. You can make it at home by following the steps shared by GC Food above.
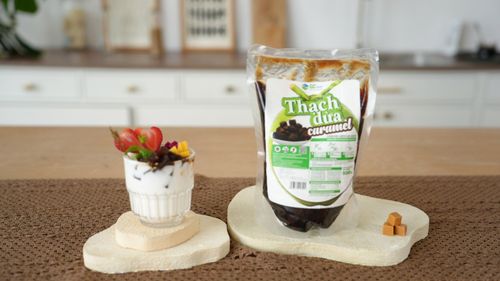
If you are too busy but still want a quick and refreshing dessert, you can explore GC Food’s ready-to-eat nata de coco and aloe vera products. Visit the official GC Food website to learn more about us and find the product that best suits your needs.
This article was compiled by Le Thi Anh Trinh - Communications Department at GC Food, specializing in researching and sharing in-depth knowledge about aloe vera and nata de coco ingredients and production processes.