 Ms. Lê Thị Ánh Trinh
In fact, making raw nata de coco at home is easier than many people think. The process includes three basic steps: soaking and rinsing to remove the sour smell, blanching in boiling water, and cooking with rock sugar for sweetness. With a few simple steps, you can make crunchy, chewy, and clear coconut jelly at home.
1. How to make raw nata de coco at home easily
With just 60 minutes (including 40 minutes of preparation and 20 minutes of cooking), you can make crunchy, chewy, and refreshing coconut jelly to treat the whole family. Even if you are not very skilled in the kitchen, you can still make this dessert successfully thanks to the simple recipe below.
1.1 Ingredients for making raw nata de coco
To serve about 2 - 3 people, prepare the ingredients according to the measurements below:
1.2 How to make crunchy, delicious coconut jelly without a sour smell
Step 1: Rinse and remove the sour smell
Place the raw nata de coco in a bowl of water, gently squeeze it, and rinse about 4 times (around 5 minutes each time). After rinsing under running water, squeeze the jelly firmly to remove as much water as possible. Finally, soak it in clean water for about 8 hours so the pieces can expand evenly and become plumper.
Step 2: Blanch and drain
After soaking, place the coconut jelly in boiling water and blanch it quickly for about 1 minute to remove bacteria and any remaining sour smell. Transfer it to a bowl of cold water for about 2 minutes to maintain its crunchiness. Then place it in a colander and press firmly with a ladle to remove excess water.
Step 3: Cook with sugar syrup
Boil 1.5 liters of water with 400 - 500g of rock sugar, stirring until the sugar dissolves completely. Add all the coconut jelly and pandan leaves to the pot and cook over medium heat for about 20 minutes. To let the coconut jelly absorb more sweetness, add another 1.5 liters of water and continue cooking for 10 minutes before turning off the heat.
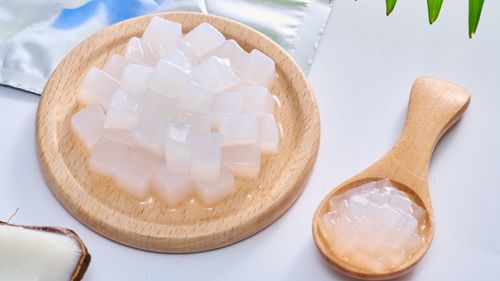
After completing this raw nata de coco recipe, you will have clear, crunchy, and chewy jelly pieces. The mild sweetness of rock sugar combined with the fragrance of pandan leaves creates a refreshing dessert that is perfect for hot summer days.

2. Suggested ways to use raw coconut jelly after preparation
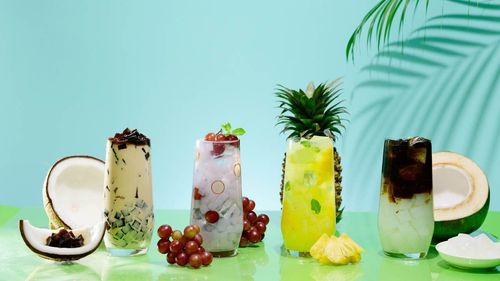
After the coconut jelly has been fully soaked and the sour smell removed, you can turn it into many different refreshing desserts depending on your preference. If you are not sure how to use it, check out the three simple ways to prepare raw coconut jelly after pre-processing below.
2.1 How to make raw nata de coco with chia seeds and fruit
To make nata de coco mixed with chia seeds and fruit, you will need about 20 minutes to prepare the ingredients and 40 minutes for cooking. The detailed instructions are as follows:
2.1.1 Step 1: Prepare the ingredients
2.1.2 Step 2: Prepare the ingredients
Wash the fruits thoroughly, then peel and cut them into small cubes (or any shape you prefer). For the jackfruit, separate the bulbs and slice them into thin strips. For the tapioca strips, soak them in warm water for about 10 minutes, then boil in hot water for 15 - 20 minutes until soft. After that, remove and rinse with cold water so the strands do not stick together.
2.1.3 Step 3: Assemble the dessert
Prepare a clean serving glass, then gently add a layer of coconut jelly to the bottom as the base of the dessert. Next, place the cooked tapioca strips on top, followed by the soaked chia seeds and the freshly chopped fruits you have prepared earlier. Arrange the ingredients evenly so the layers look more colorful and appealing. Finally, slowly pour the coconut jelly syrup into the glass until it is almost full, then finish by adding a spoonful of rich and creamy coconut milk on top to enhance both the flavor and the presentation of the dessert.
2.2 How to make colorful raw coconut jelly
With just 20 minutes to prepare the ingredients and another 20 minutes to cook following the instructions below, you will have a refreshing glass of colorful coconut jelly dessert.
2.2.1 Step 1: Prepare the ingredients
2.2.2 Step 2: Create the purple color for the coconut jelly
First, soak 10 dried butterfly pea flowers in 30 ml of boiling water for about 5 - 7 minutes to extract their natural deep blue-purple color.
Then remove the flowers and add about 3 tablespoons of the cooked coconut jelly into this colored liquid.
Soak the jelly for 15 - 20 minutes so the color gradually absorbs into the clear coconut jelly pieces. After that, rinse them quickly with cold water to make the color brighter and more stable.
2.2.3 Step 3: Create the green color for the coconut jelly
Dissolve 1 tablespoon of matcha powder in 30 ml of boiling water and stir well so the powder does not clump. Similar to step 2, soak another portion of nata de coco in the matcha mixture to create a fresh green color.
2.2.4 Step 4: Create the red color for the coconut jelly
For the third portion of jelly, use 30 ml of strawberry syrup to create an attractive pinkish-red color. Soaking the nata de coco in strawberry syrup will also add a light, sweet-and-sour fruity flavor to the dessert.
2.2.5 Step 5: Finish the dessert
For the remaining plain coconut jelly in the pot, add 3 tablespoons of lychee syrup (or longan or peach syrup if preferred) to enhance the aroma of the syrup. Finally, place the coconut jelly in the refrigerator for about 3 - 4 hours so the jelly becomes crispier.
When serving, scoop the coconut jelly into a glass, add soaked chia seeds, pour in the lychee-flavored syrup, and add ice cubes. Stir gently before enjoying. The dessert becomes visually appealing with multiple colorful layers, creating an attractive look at first sight. When eating, you will feel the crunchy texture of coconut jelly combined with the lightly chewy chia seeds, giving a refreshing and enjoyable experience.
2.3 How to make raw coconut jelly with coconut dessert
To successfully make this coconut dessert, you will need about 2.5 hours and follow the steps below.
2.3.1 Step 1: Prepare the ingredients
2.3.2 Step 2: Make a two-layer agar jelly
First, mix 5 g of agar powder with 60 g of sugar, then dissolve the mixture in 800 ml of boiling fresh coconut water. Once fully dissolved, divide the liquid into two parts:
Pour one-half into a mold to create the clear jelly layer.
Mix the remaining half with 30 ml of fresh milk and 30 ml of coconut milk to create the opaque white layer.
Note: Pour the second layer when the first layer has just slightly set, so the two layers can stick together without mixing. After cooling and chilling in the refrigerator for about 2 hours, cut the jelly into bite-sized pieces.
2.3.3 Step 3: Make coconut-filled tapioca pearls
Cut the coconut flesh into small cubes so they can be easily used as the filling. Next, place 100 g of tapioca starch in a bowl and gradually add 100 ml of boiling water, then knead the mixture carefully until it forms a smooth, soft, and elastic dough that is easy to shape. After the dough reaches the right consistency, take a small portion and wrap it around each coconut cube to form small round pearls with coconut filling inside. Once all the pearls are shaped, gently drop them into a pot of boiling water and cook until the pearls float to the surface, which indicates that they are fully cooked.
Tip: To prevent the pearls from sticking together and to keep them translucent, remove them immediately and soak them in a bowl of cooled sugar syrup.
2.3.4 Step 4: Cook the coconut milk sauce
Add 150ml of coconut milk, 100ml of fresh milk, 100ml of coconut water, 60g of sugar and 30ml of condensed milk to a pot and cook over medium heat. When the mixture begins to simmer, slowly add the tapioca slurry (made from 10g of tapioca starch mixed with 50ml of water), stirring continuously until the sauce becomes smooth and slightly thick, then turn off the heat.
2.3.5 Step 5: Assemble the dessert
Add the cooked raw coconut jelly (prepared in Section 1), young coconut meat, agar jelly, coconut-filled tapioca pearls, and a little crushed ice into a glass. Finally, pour the thick coconut milk sauce over the top, add shredded coconut, and sprinkle some roasted peanuts for extra flavor and visual appeal.
The methods for making raw nata de coco and turning it into various desserts above are suggested by the GC Food team - a company specializing in the production and supply of safe nata de coco products in Vietnam.
3. Where to buy high-quality raw nata de coco
Nowadays, consumers can easily find raw nata de coco in traditional markets or on e-commerce platforms. However, not all products are clean or meet food safety standards, especially those of unknown origin sold without clear labeling. To protect your family’s health, it is important to prioritize reputable manufacturers with strict quality control processes.
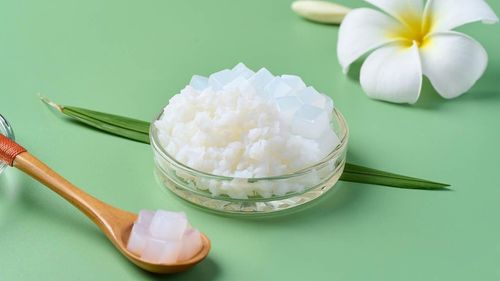
Pressed nata de coco (raw nata de coco) produced by GC Food is fermented from mature coconut water sourced from Ben Tre. Before being used in production, every batch of coconut water undergoes rigorous inspections, including sensory evaluations (color, aroma, and taste) as well as physicochemical tests such as pH level and Brix (Bx) measurements.

In addition, GC Food applies advanced Pasteurization technology to effectively eliminate harmful microorganisms such as Escherichia coli and Salmonella without the use of chemicals. At the same time, this process helps GC Food’s nata de coco maintain its naturally crunchy and chewy texture without becoming soft or deformed.
Moreover, GC Food also implements the Aseptic UHT sterilization system - an automated and closed production line from sterilization to aseptic packaging for export batches. This technology not only preserves the natural flavor, extends shelf life, and maintains the freshness of coconut jelly, but also helps the products meet the strict export standards required by international markets.
4. FAQs - Frequently asked questions about making raw nata de coco
To help you feel more confident, below are some of the most common questions people have when learning how to make dried coconut jelly (raw nata de coco) at home. Let’s go through these typical concerns so you can avoid common cooking mistakes.
4.1 What is raw nata de coco?
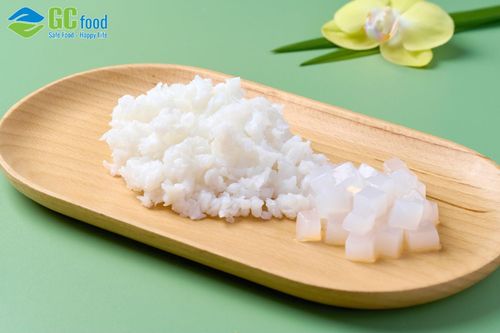
Raw nata de coco is actually a product of the fermentation of mature coconut water by the bacterium Acetobacter xylinum. After the fermentation period, the coconut water transforms into white jelly-like layers with a distinctive, crunchy and chewy texture.
4.2 What is the difference between raw nata de coco and dried nata de coco?
Raw nata de coco and dried nata de coco are essentially the same; they are simply two different names used to refer to the unprocessed ingredient. This product is created through the fermentation of mature coconut water using the bacterium Acetobacter xylinum.
4.3 Why does nata de coco become sour or slimy?
Nata de coco can become sour or slimy mainly due to the nature of the natural fermentation process. Raw nata de coco is produced from mature coconut water fermented by Acetobacter xylinum, which gives it a naturally sour taste and strong aroma.
If you do not rinse the coconut jelly thoroughly and squeeze it several times to completely remove the acidic liquid, some of these residues may remain trapped inside the jelly pieces. Over time, these leftover acidic compounds can affect both the texture and the flavor, making the coconut jelly taste more sour and less pleasant. In addition, if you skip the important step of blanching the jelly in boiling water, some fermentation bacteria may remain active. This can cause the coconut jelly to deteriorate more quickly, develop a slimy texture, and spoil much faster during storage.
Overall, making raw nata de coco at home is not complicated as long as you follow the important preparation steps, such as thorough rinsing, squeezing out excess liquid, and blanching briefly in boiling water to remove the natural sourness. For the best quality, you can also choose raw nata de coco from GC Food in the About Us section.
This article was compiled by Le Thi Anh Trinh from the Communications Department of GC Food, specializing in collecting and sharing in-depth knowledge about ingredients and production processes for aloe vera and nata de coco.