 Ms. Lê Thị Ánh Trinh
Delicious coconut jelly is a popular topping loved for its light sweetness and refreshing, slightly chewy texture. It’s not only a great snack but also pairs well with drinks like jasmine milk tea, enhancing flavor and enjoyment. This guide shares how to make it at home, along with tips for choosing the right ingredients and cooking it properly to prevent sourness.
1. What is coconut jelly?
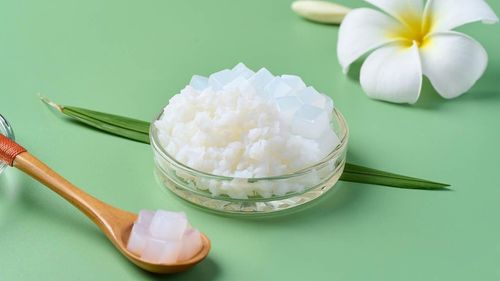
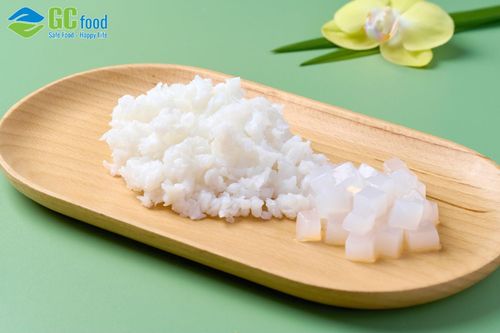
Coconut jelly (nata de coco) is a fermented jelly made naturally from coconut water, then cut into small pieces and soaked in light sugar syrup. High-quality nata de coco is known for its pleasantly chewy texture, mild sweetness, and a subtle coconut aroma without any strong sour taste.
Unlike regular jelly made from agar or gelatin powder, coconut jelly forms a natural fibrous structure during fermentation. This gives it a distinctive chewiness and often provides higher nutritional value thanks to its coconut water base.
2. What makes coconut jelly crispy and delicious?
A high-quality batch of coconut jelly should meet several standards in terms of texture, color, and flavor.
Texture: Lightly chewy and crisp, not too hard and not crumbly or overly soft.
Taste: Mildly sweet, well-balanced without being overly sugary or sour.
Aroma: A gentle, natural coconut fragrance with no unusual odors.
Color: Clear white or slightly ivory, not cloudy.
Soaking Syrup: Clear and clean, with no bubbles or sour smell.
When added to beverages, well-made coconut jelly helps balance the richness of milk and the aroma of tea, creating a refreshing taste that never feels heavy or overly sweet.
3. How to make delicious coconut jelly at home
3.1 Ingredients
3.2 Preparation time
De-souring and initial rinsing: 30 minutes
Soaking: 8 hours
Cooking the sugar syrup, soaking, and chilling before serving: 2 - 4 hours
3.3 Step-by-step instructions
Step 1: Prepare the raw coconut jelly
If you are using raw coconut jelly blocks, cut them into bite-sized cubes or thin strips. Rinse the pieces under clean running water 3 - 4 times, about 5 minutes per rinse. Then rinse once more under running water, squeeze out the excess water, and soak the jelly in clean water for about 8 hours so it can fully expand.
Next, bring a pot of filtered water to a boil (just enough to cover the jelly). Add the jelly and boil for about 1 minute to help remove its natural sourness.
Transfer the boiled jelly to a bowl of cold water and soak for another 2 minutes. Then remove it and use a spoon or ladle to press firmly, draining as much water as possible from the coconut jelly.
Step 2: Cook the coconut jelly
Add 3 liters of filtered water to a pot, then add 1 kg of rock sugar and bring it to a boil until the sugar fully dissolves.
Next, add the pandan leaves and the prepared coconut jelly topping to the pot, then simmer over medium heat for about 20 minutes. Pour in another 3 liters of filtered water, continue cooking for 10 more minutes, and then turn off the heat.
Step 3: Chill and store
After cooking, allow the coconut jelly to cool completely, then transfer it to an airtight container. Refrigerate for at least 1 - 2 hours before serving so the texture becomes firmer and the flavor develops fully.
After cooking, the coconut jelly becomes clear white with an even color and a pleasantly crisp and chewy texture. In terms of flavor, it has a light sweetness from the rock sugar and a subtle natural aroma from the pandan leaves.
3.4 Tips to prevent coconut jelly from turning sour
Rinse, soak, and briefly boil the raw coconut jelly thoroughly to remove the sour smell created during fermentation. If these preparation steps are not done carefully, the final product can easily develop a sour taste that affects the overall flavor.
Store the finished jelly in an airtight container in the refrigerator and consume it within 5 - 7 days to maintain its best taste and quality.
3.5 Common mistakes when making coconut jelly
Jelly still smells sour: It may not have been boiled long enough, or the boiling water was not replaced.
Jelly tastes too sweet: Add about 100 - 200 ml of filtered water to balance the sweetness.
Jelly tastes bland: The jelly may not have soaked in the sugar syrup long enough to absorb the sweetness.
Cloudy, soaking syrup: This can happen if the rock sugar has not fully dissolved or if the pandan leaves were left in the pot for too long.
With this method, you can prepare delicious coconut jelly to enjoy on its own or use as a topping for jasmine milk tea, sweet soups, and many other refreshing desserts.
3.6 How to choose good coconut water for homemade fermentation
If you prefer not to use raw coconut jelly and want to ferment coconut jelly at home using fresh coconut water, keep the following tips in mind to ensure the best results:
Choose mature coconuts that feel heavy and produce a strong sloshing sound when shaken.
Coconut water should be clear, not cloudy, and free from any sour smell.
The taste should be naturally sweet, not bland or diluted.
The quality of the coconut water greatly affects both the texture and flavor of the final jelly, so selecting good ingredients is essential for making delicious coconut jelly at home.
3.7 How coconut jelly is used in beverages
Besides enjoying it on its own, coconut jelly is also an ideal topping for many drinks, especially jasmine milk tea. The gentle aroma of tea combined with the refreshing, chewy texture creates a well-balanced drink with a light, creamy sweetness. Simply add the jelly to a glass of iced jasmine milk tea to create a refreshing drink similar to those served at your favorite beverage shops.
4. Ingredients for making delicious jasmine milk tea with coconut jelly
To make a rich and aromatic cup of jasmine milk tea with a creamy taste, prepare the following ingredients:
5. No-roast recipe
5.1 Brewing the jasmine tea
You can heat the water on the stove or use an electric kettle to save time. Bring the water to a boil, then turn off the heat and let it cool slightly. If you have a thermometer, check that the temperature is around 80 - 85°C (176 - 185°F).
Pour the hot water into a pot or container - a glass container is recommended because it retains heat well. Add the jasmine tea leaves and gently press them down with a spoon so they sink to the bottom. Let the tea steep for 15 - 20 minutes so the leaves can fully release their flavor and aroma.
Avoid steeping the tea for too long, as it may become bitter, while steeping it for too short a time can result in a weaker brew. After 15 - 20 minutes, strain the tea through a sieve to remove the leaves and keep the rich jasmine tea concentrate.
5.2 Preparing jasmine milk tea
Add the non-dairy creamer powder and white granulated sugar to the freshly strained tea concentrate, then stir well. Continue mixing until the sugar and creamer fully dissolve, creating a light milky-brown mixture.
Next, add 1 tablespoon of almond syrup and stir again until well combined. The almond syrup enhances the drink with a distinctive aroma, allowing you to enjoy the rich tea flavor complemented by a subtle hint of almond.
5.3 Serving and enjoying
Pour the jasmine milk tea into a glass filled with ice, then add the coconut jelly on top and serve immediately. The chewy jelly helps balance the sweetness of the drink and makes it even more appealing. Its light sweetness and refreshing texture blend beautifully with the creamy finish and gentle tea bitterness, creating a balanced and satisfying beverage.

6. Roasted tea method
6.1 Preparing the creamer and roasting the jasmine tea
First, add the non-dairy creamer powder to hot water and stir well until the powder fully dissolves.
Place a non-stick pan on the stove, then add the jasmine tea leaves and sugar. Roast over low heat, stirring continuously to prevent the sugar from burning. Once the sugar has melted and blended with the tea leaves, forming a darker, slightly thick mixture, turn off the heat.
Next, pour in the prepared creamer mixture and stir well so all the ingredients combine evenly. Turn the heat back on and cook for another 5 minutes until the sugar and tea mixture fully dissolve.
Finally, strain the milk tea through a sieve to remove the tea leaves, then add 1 tablespoon of almond syrup to enhance the drink’s aroma.
6.2 Serving and enjoying
Pour the milk tea into a glass, then add chewy coconut jelly on top to make the drink more appealing. With this method, the finished jasmine milk tea has a stronger tea flavor thanks to the light roasting step on the stove. This recipe is especially suitable for those who enjoy a more pronounced jasmine tea taste, without the creamer overpowering the natural aroma of the tea.

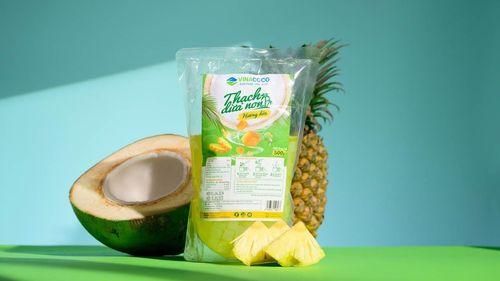
If you don’t have time to prepare coconut jelly from raw ingredients, you can consider ready-to-use coconut jelly products from GC Food. These products are produced through a closed manufacturing process that combines Pasteurization technology with an advanced Aseptic UHT system, helping ensure product quality and consumer safety.
7. Quick Q&A about delicious coconut jelly
7.1 What makes coconut jelly good?
High-quality coconut jelly should have a pleasantly chewy texture, a light natural sweetness, and a clear white appearance without any sour taste. When eaten, it offers a satisfying chewy texture along with a gentle, refreshing aroma of natural coconut water that enhances the overall taste experience.
7.2 Why does coconut jelly turn sour?
The main reason is usually insufficient preparation of the raw coconut jelly before cooking. To prevent sourness, make sure to rinse and soak the raw jelly thoroughly according to the preparation steps mentioned above.
7.3 How long does it take for coconut jelly to become chewy?
If you ferment coconut jelly at home, it usually takes about 12 - 14 days for the jelly to reach the ideal thickness and chewy texture. If the fermentation time is too short, the jelly may not develop enough thickness or the desired chewy texture. However, leaving it to ferment for too long can make the jelly overly hard.
7.4 How long can coconut jelly be stored?
After cooking and soaking in sugar syrup, coconut jelly can be stored in the refrigerator for about 5 - 7 days. During this time, the jelly maintains its best flavor and texture. After this period, the quality may begin to decline, so it’s best not to consume it to avoid potential health risks.
With just a few simple steps shared above, you can easily prepare jasmine milk tea at home to enjoy or serve to family and friends on the weekend. This recipe is suggested by GC Food, a company with many years of experience in producing coconut-based ingredients. Visit the GC Food introduction section to learn more about its manufacturing process and explore a variety of related products.
This article was compiled by Le Thi Anh Trinh - Communications Department at GC Food, specializing in collecting and sharing in-depth knowledge about ingredients and production processes for aloe vera and coconut jelly.